
 Pin it
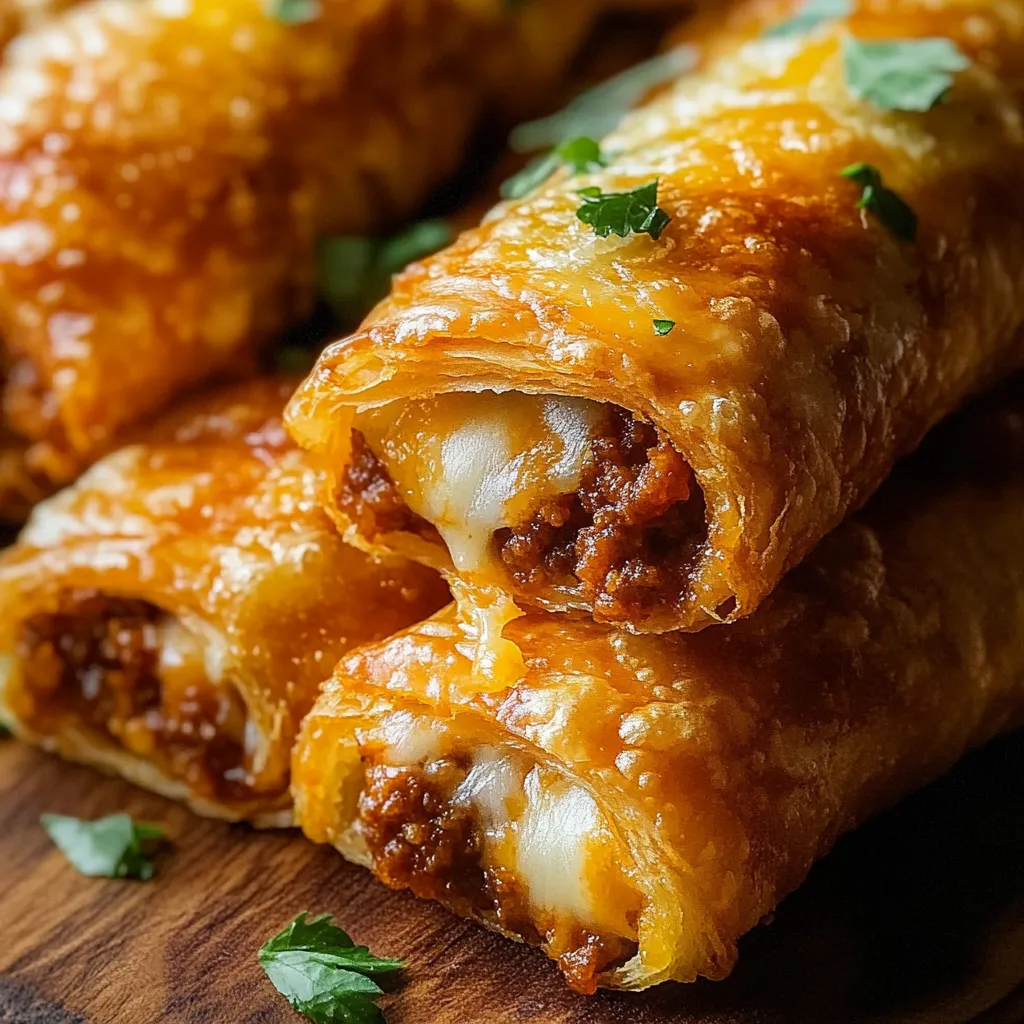
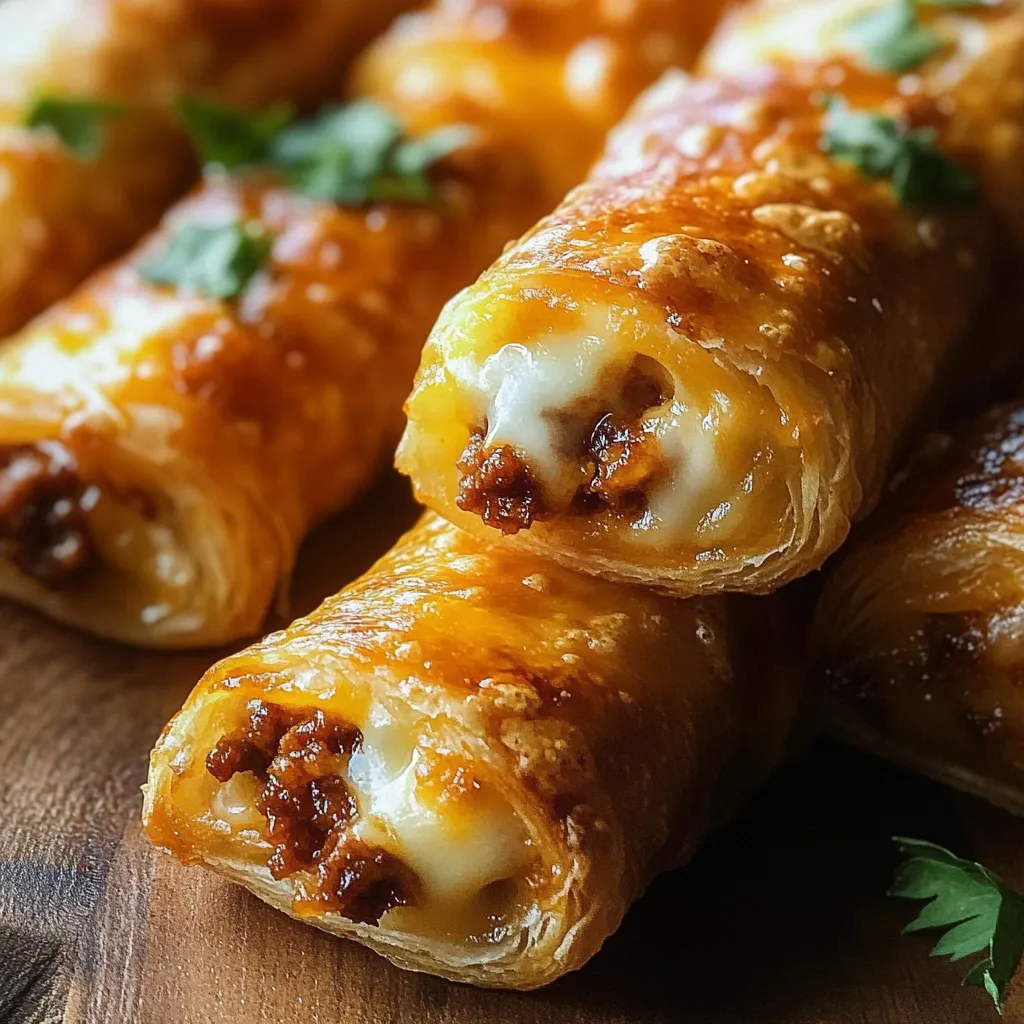
Transform your taco night with these irresistible cheesy taco sticks that combine seasoned meat and melted cheese wrapped in golden, crispy dough. This creative twist on traditional tacos delivers a portable, flavor-packed experience that will revolutionize your dinner routine. Each stick offers the perfect balance of zesty filling and flaky exterior that makes every bite memorable.
The first time I made these taco sticks for my weekend gathering, they vanished before I could even announce they were ready. The combination of crispy exterior and cheesy filling created such an addictive snack that it's now requested at every family event.
Kitchen Essentials
- Premium ground beef: Choose 80/20 lean-to-fat ratio for the perfect juicy filling
- Fresh shredded cheese: Pre-shredded varieties contain anti-caking agents that affect melting
- Quality pizza dough: Fresh dough provides better texture than frozen alternatives
- Authentic taco seasoning: Look for versions without added fillers or preservatives
- Parchment paper: Prevents sticking and ensures perfect browning
Creating Your Masterpiece
- Brown The Meat
- Crumble beef into a hot skillet, breaking it into small, even pieces.
- Watch for a deep brown color that indicates proper caramelization.
- Season With Care
- Sprinkle taco seasoning evenly over browned meat, stirring to coat each piece thoroughly.
- Allow flavors to bloom in the pan.
- Prepare The Base
- Roll dough into uniform rectangles on a lightly floured surface, ensuring even thickness for consistent baking.
- Create The Sticks
- Layer seasoned meat and cheese along the center of each rectangle, carefully sealing edges to prevent filling escape.
- Perfect The Shape
- Gently twist each stick to create an attractive spiral, placing them with adequate spacing on prepared baking sheets.
- Achieve Golden Glory
- Bake until deeply golden, rotating pans halfway through for even browning and ultimate crispiness.
 Pin it
My grandmother taught me the importance of letting the seasoned meat cool slightly before filling the dough. This simple step prevents the cheese from melting too quickly and makes assembly much easier.
Perfect Pairings
Transform these sticks into a complete meal by serving alongside fresh pico de gallo, Mexican street corn salad, or cilantro-lime rice. For casual entertaining, arrange them on a platter with various dipping sauces.
Creative Combinations
Experiment with different cheeses like pepper jack for extra heat or Mexican cheese blend for authentic flavor. Try using ground turkey or chicken for a lighter version, or black beans for a vegetarian twist.
Fresh Storage Solutions
Keep leftover taco sticks crispy by storing them in a paper bag at room temperature for up to 24 hours. Reheat in a hot oven for 5 minutes to restore their original crunch.
 Pin it
These taco sticks have become my signature potluck contribution, earning rave reviews and recipe requests at every gathering. The key lies in quality ingredients and careful assembly - when each step is executed with attention to detail, the result is an irresistible fusion of Mexican flavors and comfort food appeal that keeps everyone coming back for more.
Frequently Asked Questions
- → Can I use a different type of cheese?
- Yes, try mozzarella, pepper jack, or Monterey Jack for a different flavor profile.
- → What if I don’t have Pillsbury Pizza Dough?
- You can use homemade pizza dough or crescent roll dough as a substitute.
- → How do I store leftovers?
- Store in an airtight container in the fridge for up to 3 days. Reheat in the oven to restore crispiness.
- → Can I make these ahead of time?
- Assemble the taco sticks, freeze them on a baking sheet, then transfer to a freezer bag. Bake directly from frozen, adding a few extra minutes.
- → Can I add veggies to the filling?
- Absolutely! Add diced jalapeños, bell peppers, or onions for extra flavor.